Mike and I decided to skip the battle of Lutzen (2 May 1813), as we've played it a couple of times before, moving swiftly to the battle of Bautzen. The Russians and Prussians dig in behind the Spree river - Napoleon frontally assaults on day one whilst Ney attacks the right of the Allied line on day two.
In this battle the French get bridging trains (one per Corps), so it's not just a charge across the bridge. If only I had some suitable pontoon bridge models!
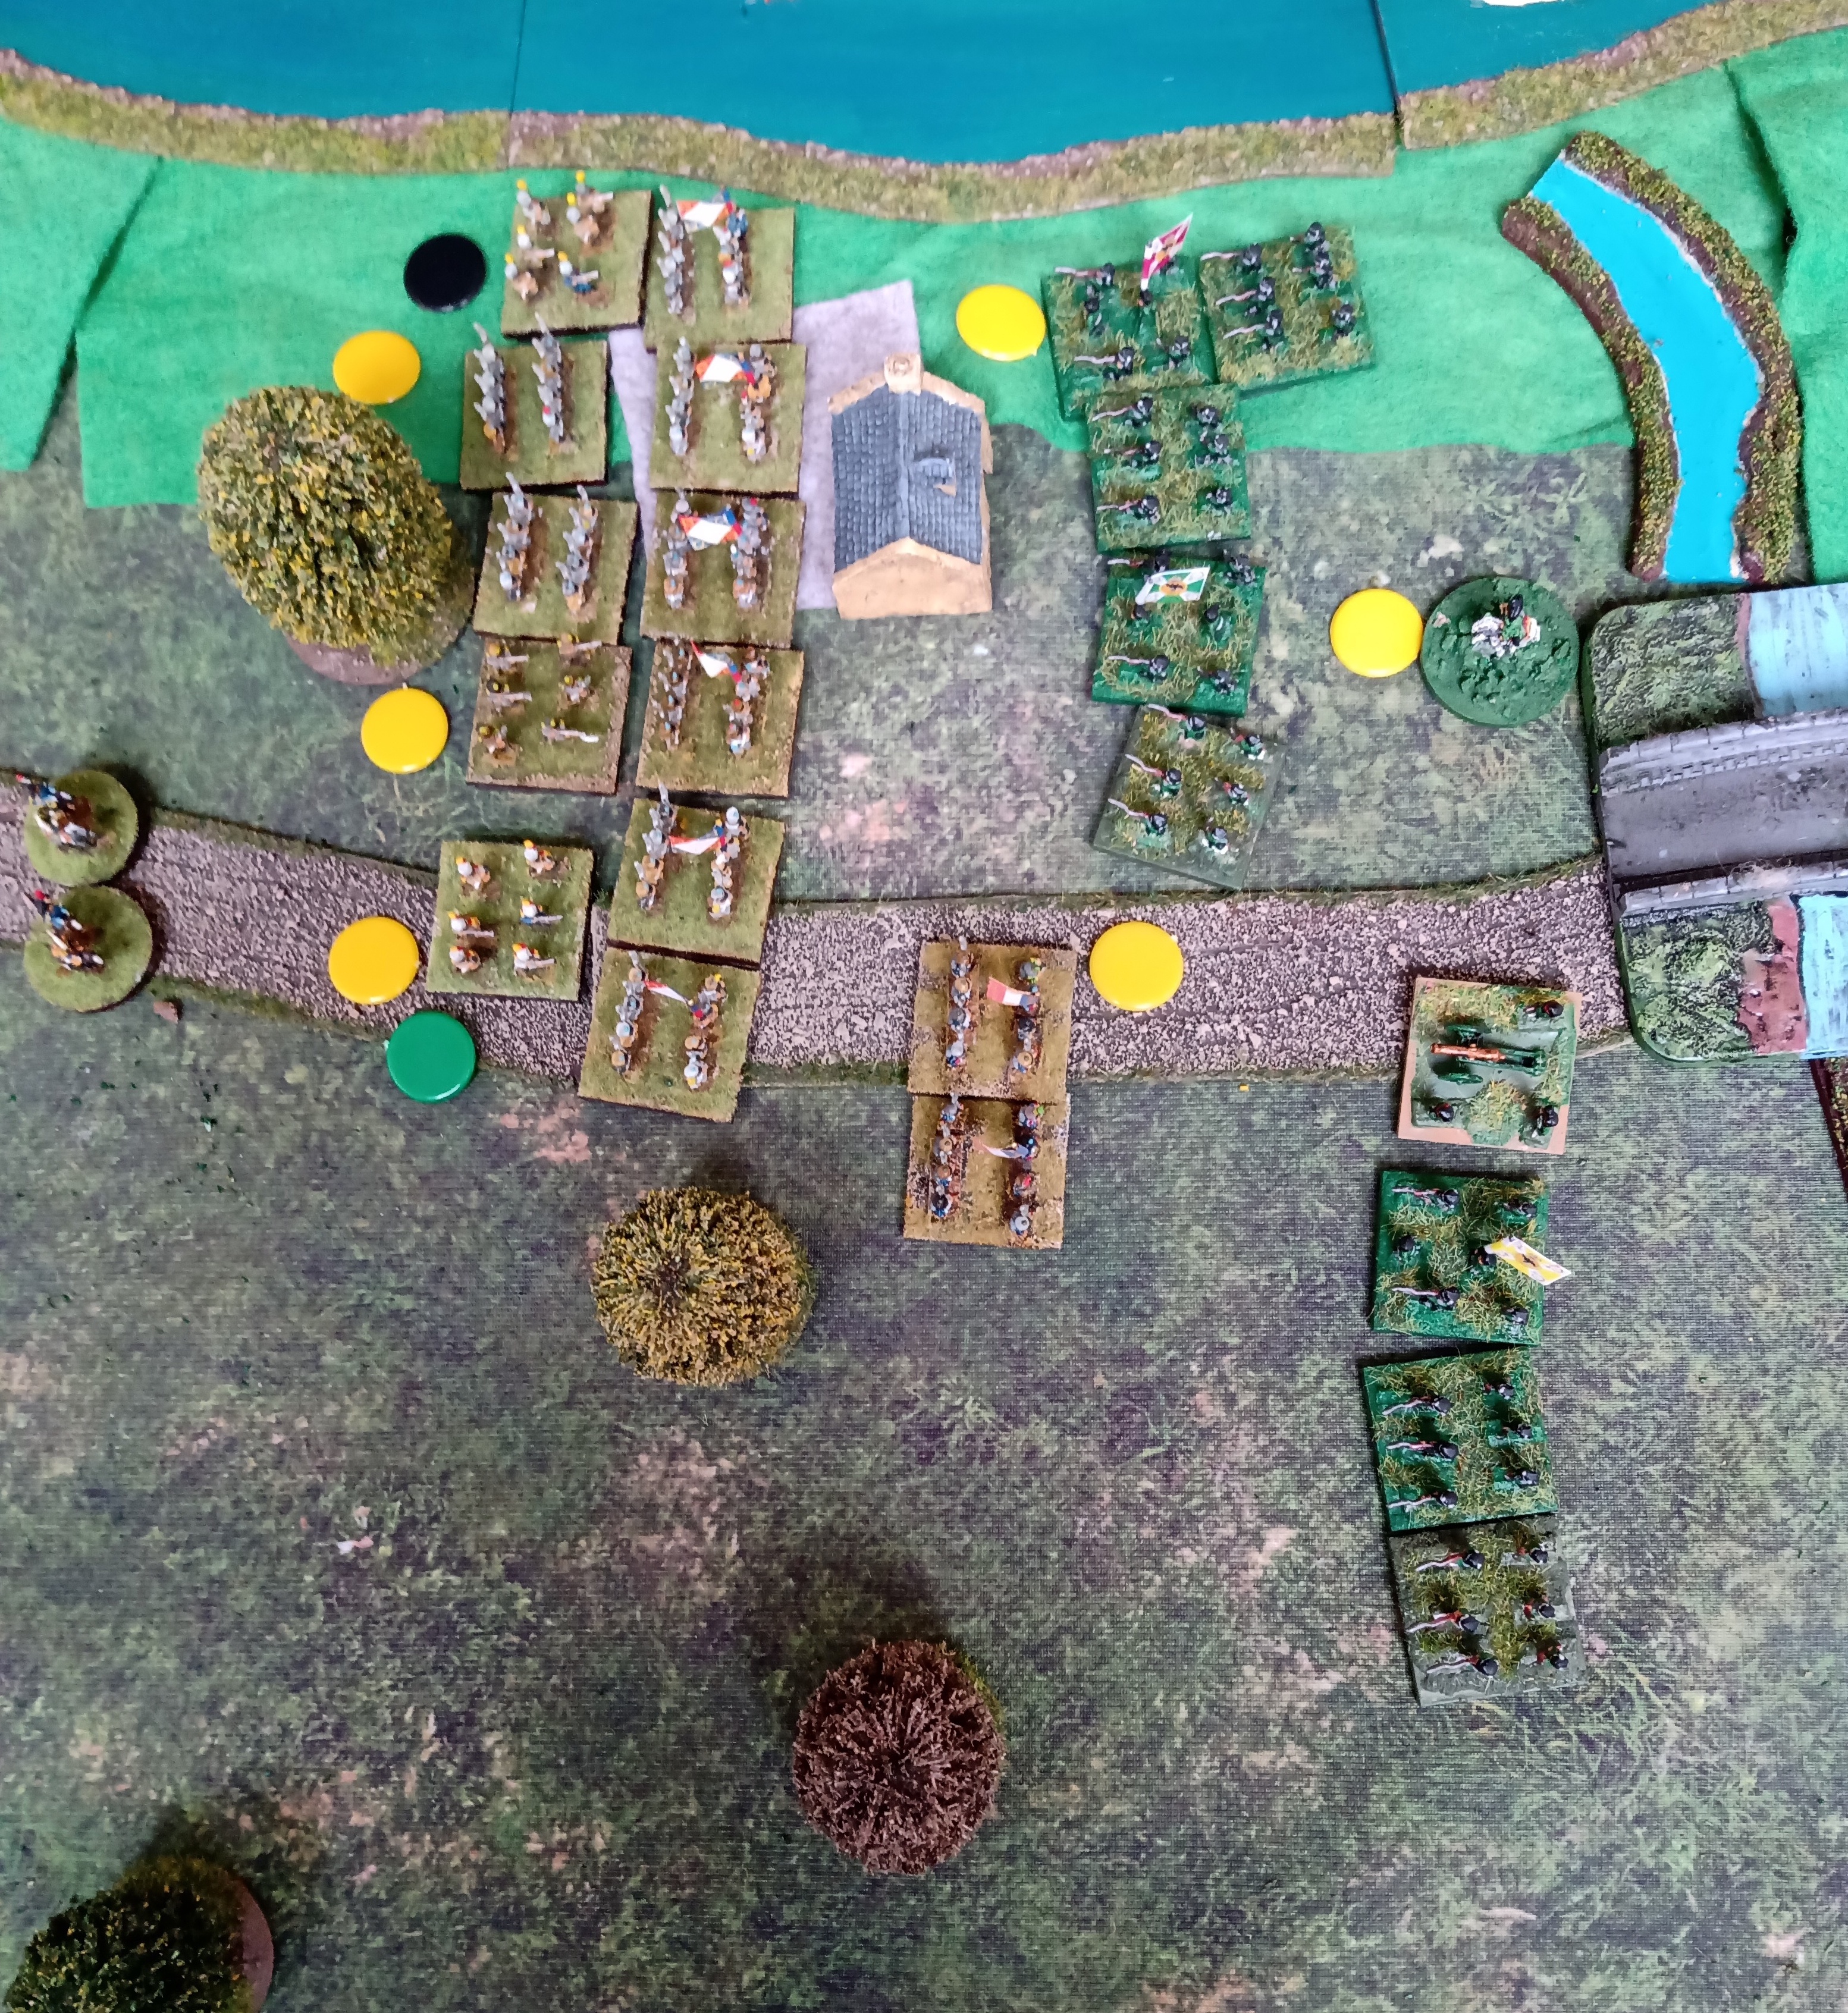
Here is the map - Napoleon to the left, Ney at the top, Allies in the middle. Having got used to playing with Veteran French in the last few battles, I now found that in taking the French I was mainly playing with trained troops - less likely to charge home if fired upon, they go spent on fewer casualties.
The Set upHere is the table ready for the start. The on table troops in the foreground are Soult (left) & Marmont, who will advance to the Spree and cross it.
On the other flank McDonald, the Guard & Oudinot prepare to assault across the bridge and pin the centre.
Mike had troops in Bautzen, with his main defence line dug in further back. I didn't expect to do well with the frontal assaults, I hoped that my flanking manoeuvres would do better.
Move 2
After two moves things are hotting up. On the right Oudinot has pushed his troops in column to take on the defenders of Jenkwitz. In the middle Mcdonald has taken Bautzen and is heading for the main line of resistance.
On the left Soult and Marmont have crossed the river. One of Napoleon's challenges in 1813 was a lack of cavalry. Mike added to my troubles on the day by long range artillery sniping, which took out Soult's cavalry....
Move 3
By the end of move 3 the battle had split into 3 sectors. On the right Oudinot squared off against Gortchakov. Neither side had quite the numbers to kill anything, but steady Russian fire kept the French infantry from charging and the cannon from being deployed.
In the middle Macdonald & Marmont, supported by the Guard, attacked the defensive lines.
On the left Soult was left to his own devices. The Russians lined up on the hill and brought up their guns. The French assaults were disrupted and never developed, but the Russians were not willing to counter-attack and give up their defensive advantage. They did try a sneaky flank attack (just above the six islands in the river) but were held off.
Move 4
On the French right we have Oudinot - he has formed "block" in preparation for another charge - to his right rear is his supporting artillery, driven off by the pesky Ruskis again!
In the middle the French throw in the Guard against the dug in Allies.
On the left the Russians hold the hill. The French hang about at the bottom of the hill, whilst Soult diverts a division to avoid the outflanking Russians. If only the cavalry were still around!
A close up of the central battle - The Guard to the right, Marmont & Mcdonald to the left. The line in foreground are re-grouping after losing an earlier assault.
At the end of move 4 night fell, in the real world we had a cup of tea (Yorkshire, of course!) before resuming play at the start of day two.
Move 6
2 moves into day two, things have started to improve for the French.
On their right flank Oudinot has broken through, aided by the Guard cavalry doing a flanking charge on the brave defenders of Jenkwitz. In the centre the French assault the defences, throwing in masses of troops and the Guard.
On the left flank Soult is joined by Ney. A series of low movement rolls means the French advance slowly (or not at all, in some cases!) but Mike responds by building a defensive line and holds the hill. Those 4 lakes act as some sort of "super moat" - breaking up the French attacks.
Move 8On the right the French drive a massive wedge into the Allies and start taking VP (Victory Point) villages (red exploding markers).
On the left the French take the big hill (worth a VP) but fail, so far, to get the last remaining VP village or the road exit. If only I had not lost my cavalry! I did manage to capture more non-VP villages...
Move 9
On the right the French broke the Allied line, but were too far away to get troops to the road exit. It had been a long hard slog to get this far!
On the left the French failed to get the VP village across the stream but did hound the Russians away from the important VP hill.
At this point Mike and I called it a day. The final French turn saw them masters of the battlefield and in possession of 3 VP, but with no further moves left to take further VPs and Mike too depleted to attempt to take any back, it was a draw.
Once again an exciting game with ups and downs, decisions to make and engaging to the end. A couple of thoughts:
1. French troops are no longer veteran - and the enemy has skirmishers. The French superiority margin is wearing down and thinner than earlier battles.
2. Cavalry - as French, you don't get much. The Guard cavalry did a great job, but I lost 2/3 of my cavalry early on and that meant I could not exploit at the end of the game.
Once again, a well written and finely balanced scenario gave rise to an interesting and engaging game.
Photoshoot
French Chasseurs of the Guard
Guard artillery + line = Grand battery
Italians charging up the hill!
Guard Cavalry backing up an infantry charge
My Middle/Young Guard - in this case loads of Veteran stands lumped together. Proper troops have been painted and await warmer weather for basing.