Showing posts with label Tumbling Dice. Show all posts

Friday, 8 July 2022

Chocks Away - Friday Night WW1 Aerial Combat

 A couple of weeks ago I hosted a friend, Luke, for a Friday evening's World War 1 air combat.  We used 1/600 Tumbling Dice planes and used "Chocks Away" - a set of really simple rules written by myself.  This is not so much an AAR as a sample of how our two games progressed on the night.

Luke chose to be the Allies, with RE8 Bombers, Bristol Fighters and Camels.  I fielded Albatross III fighters and Fokker Dr1 triplanes.  Yes, two Richtofens were present.

The dice colour represents skill - Ace = red, Trained = yellow/clear, Raw = green.  Height is in 6 bands, related by the dice pips.  Counters represent factors - bombs on board = blue, jammed gun = black, moved this go = red, damaged = yellow.  The white and purple counters were to help Luke work out what sort of similar looking Olive drab plane he was looking at!  :-)

So, here are the pictures!

British bombers, game 1.


British Bombers in the 2nd game


German start - 


Close Combat - getting stuck in!!!


All in all we had two really fun games, with Luke doing much better in game 2 and getting his bombers off the far table edge.  A great way to end the week.  !

As ever, I hope this inspires you to have a go.

Friday, 24 December 2021

Handley Page O/400 in 1/600

This week I went to the Leeds club (my new local) and played "Chocks Away!" - a WW1 very simple game that I came up with a few years ago for my tiny Tumbling Dice planes.  Suitably inspired by an hour or so's fun, I have started to prepare my remaining HP O/400s for battle.  Here goes....

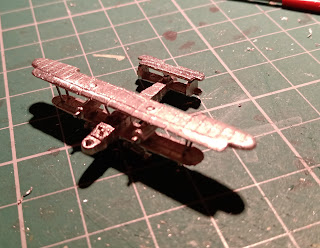
The Tumbling dice kit.  Usually, with Tumbling Dice, you get the plane as one casting, or two if it has non-retractable wheels.  Here you get the body/lower wing, upper wing, 2 x engines, 2 x wheels (+ spare) and a tail.  This is the casting, wire brushed, holes drilled and one central spar added.

I drilled out two holes at the outside of the wings - all the way through the lower wing and a good way into the upper wing, to receive a pair of struts each side.


I drilled 4 holes on the fuselage to accept a bent staple strut, which will provide a secure way of attaching the wing.  One paperclip glued in, one to go....


I glued a strip of plastic on the outer side of the engine to represent the prominent tube radiators.  

I glued the two engines to the lower wing, checking that they are parallel to the fuselage and at the same height above the wing.


Once I attached the top wing to the two engine mountings and the two staple based struts over the fuselage, I turned the plane upside down and threaded staples through to be wing struts.  The plane should be sturdy enough that these additions are cosmetic only.  Doing this from the bottom, into the part-holes previously drilled into the top wing underside means that the trimming and filling is only needed on the bottom of the plane.  

I attached the two sets of wheels and re-inforced these with some off-cuts of plastic to secure the wheels to the plane.  As it will "fly" on a stand, the undercarriage is cosmetic - but I still want it to be sturdy.


The next step was to add the top tail plane at the rear, like this - 


The final step was to add guns.  The HP O/400 had two x Lewis in front of the pilot (ring mount), 1 ventral gun (not modelled - I'm not sure where the hatch even was!) and two guns in the rear dorsal position.  These seem to have been mounted to give cover to 180 degrees but this was done separately, at the corners of the rear dorsal station.   I decided not to model the front guns as they are likely to get broken off - but I may rethink that and add some later.

Guns added:

Finished!  The prominent gaps in the top wing around the engine mounts will be sorted out as part of the painting process.

In real life, the O type bombers were mainly used at night, but as this is just a knock-about simple game, I'm happy to have them operating in daylight.

As ever, I hope this inspires you to get some of these and have a go - they are quite quick to make and very satisfying once completed.

Sunday, 9 August 2020

Air Apaches - B25 Mitchell Strafers - 345 Bomb Group

 One of the distinctive sets of markings were those applied to the 345 Bomb Group, operating in the Pacific.  

These planes represent the Hells Belles squadron - with a bright blue Bat emblazoned on the nose of their B25-J strafers.  

The strafers carried 6 or 8 fixed .50cal MG in the nose, a possible 4 further fixed .50 cal package guns either side of the cockpit and the top turret packed a further 2 .50cal.  They also had bombs in the bomb bay.  Their tactics were to go low, with the element of surprise, hoping to shoot up the Japanese planes whilst they were still on the ground.

The models are 1/600 Tumbling Dice, USAAF markings from Doms Decals, the Bat nose & tail Apache markings a combination of hand painting & suitable letter transfers.  I added a battery of nose guns and side package guns to the Tumbling Dice model.


A lone Bat in close up...


D-Day Dakotas

 A few photos of my D-Day Dakota Fleet.  Fuselage codes CJ - 71st Sdn, & CU 72nd Sdn, both from 434 Troop Carrier Group, 53rd Troop Carrier Wing.  Based at Aldermaston.

The planes are Tumbling Dice 1/600.  The USAAF decals are Doms Decals.  The wing stripes are painted by hand - as were the originals!  The D-Day markings do make the slightly boring OD over light grey a little more eye-catching.

The initial D-Day drops of 82nd & 101st Airborne took place on the night of 5/6 June, so this must be one of the follow up drops on 6 June.

3 planes from each squadron:


After running into the Luftwaffe.....


Sunday, 12 July 2020

Planes from Storage 1

As we were clearing out our storage the other day, I found a box or two of treasures - painted 3 years ago, but still not photo'd or played with.

Here, for your delectation....

Checkertail P40s


Hawk-75s of the Finnish Airforce....


All 1/600 Tumbling Dice planes (the Hawk 75s are Myrskys....), Decals from Doms Decals, stands Litko.


Sunday, 28 June 2020

From the Workbench - 4

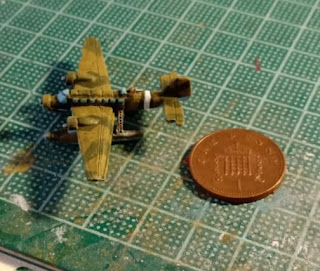
A little while ago ......  OK, nearly three years ago, I started a Ju52 Floatplane project.  A couple of weeks ago I finished making it and got it underpainted.  Here is this weekend's work - the paint job.  Here goes:

Ju 52 Float Plane - painted - 1

As you can see, you get quite a lot of Ju52 for a penny!

Ju 52 Float Plane - painted - 2

Ju 52 Float Plane - painted - 3


In addition, I've increased the WW 1 collection a little:

HP 0/400 Heavy Bomber

Handley Page 0/400 1/600 scale model plane

Halberstadt CL2 in camo fabric.  These were used to bomb targets from low level, so I added rear MG (of course!) and bomb racks for the gunner to drop on the Tommys!

1/600 scale Halberstadt CL2 model plane

I am quite pleased with the "pointillist" camo result.  

Once they have been gloss varnished I'll apply transfers (decals) and we'll see what the finished result looks like.


Thursday, 3 August 2017

On the workbench - July part 3

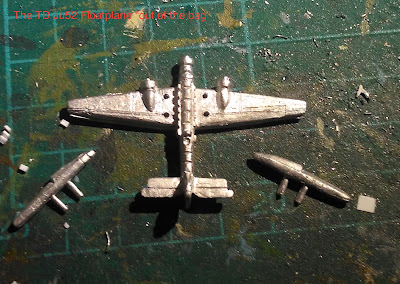
When I got my TD Ju52s, at the bottom of the bag I discovered a float, which quickly proved to be designed to fit the big holes that I had earlier spent a lot of time filling in.  That got me thinking....

A quick blitz on the internet provided some nice pictures of Ju52 floatplanes, so at Salute I picked up 3 packs.  I also ordered some 1/600 photo-etch ladders, as pictures of these planes shows a permanent ladder attached from the left float to the passenger cabin door.

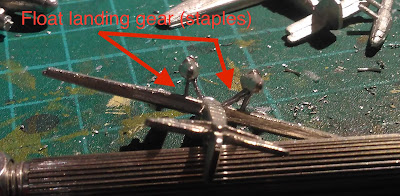
I then set about working out how to attach the floats with a more intricate structure than the original model.  The TD model as supplied is quite sturdy (always a positive attribute for war-games kit) and as the floats & undercarriage are under the plane, you won't see the attachment much.

But, what the heck!

Here are photos of the project so far - this is my "Mark 1", the ladder is not attached but otherwise it is finished......

The TD Ju52 Floatplane, what you get.....

I only "push-fit" attached the floats - they hold up well without glue

The "Mark 1" Ju 52 FP, which has all the add-ons from previous blogs plus detailed landing gear, which of course is invisible in this photo !

Not the best photo, but you can see that the gear consists of four struts per float.  There is a cross-wise brace that may be added to the "Mark II" model.  No ladder, as I was worried whether it would survive transport back to the UK for undercoating.

The Ju52 Floatplane was used by the Luftwaffe in all theatres of war (yes, in N Africa too, as it could load/unload in harbours or the beach).  There are some nice colour schemes to experiment with.


On the workbench - July part 1

Here are a couple of modifications to the 1/600 B-17 G from Tumbling Dice

TD B17Gs (and I have a lot of these) sometimes have the top turret MG missing.  Here's an easy fix that also adds a little variety to your bomber stream....


USAAF B17 Gs had a defensive weapons upgrade over earlier models.  They got a chin turret and two armoured gun positions in the Navigator/Bombadier compartment, either side of the nose.  It is easy to model these two positions using a bit of plastic rod, cut to shape and sanded down....


Sunday, 9 July 2017

Gallery - 2

Jg 1 sported a really neat chequered paint scheme in late 1943.  Here is my 1/600 take on it....


3 staffel, JG 1, highly visible!

With 1 Staffel following 

From the side.  TD planes, Dom's Decals + markings, Beacon transfers (1/285 scale) tiny checks.