New Gallery Page added - Austria 1792-98. OK, here's some teaser pics...


New Gallery Page added - Austria 1792-98. OK, here's some teaser pics...
Here are my photos of the Austrian Chevaux Leger 1792-98 in Green uniforms. These are Baccus SBR05 British Light Dragoons, with the plume on the hat removed, the hat behind the front plate filed flat (to create a false front), a plume added (repurposed bayonet again).
The Command Officer, Flag bearer & Trumpeter are Kuirassiers (SAU06) with a paint job. As half the Chevaux Leger units wore white, a white coated unit will follow in due course.
Here they are!


I posted earlier about the "Mk 2" Austrian Command conversions of the Baccus AWL02 Loyalist skirmisher loading figure into drummers and flag bearers. Austrian command figures 1792-98 Mk2 - part 1
I attach photos of the finished command bases, now that they are "game ready". I'm really quite pleased with them, not too hard to make and no head swaps to worry about.
I am going to make more for raw unit commands (no flag, flautist instead) and trained (with flag) commanded by an officer in a tricorne.
Once again, I hope this inspires you to make some of these conversions.


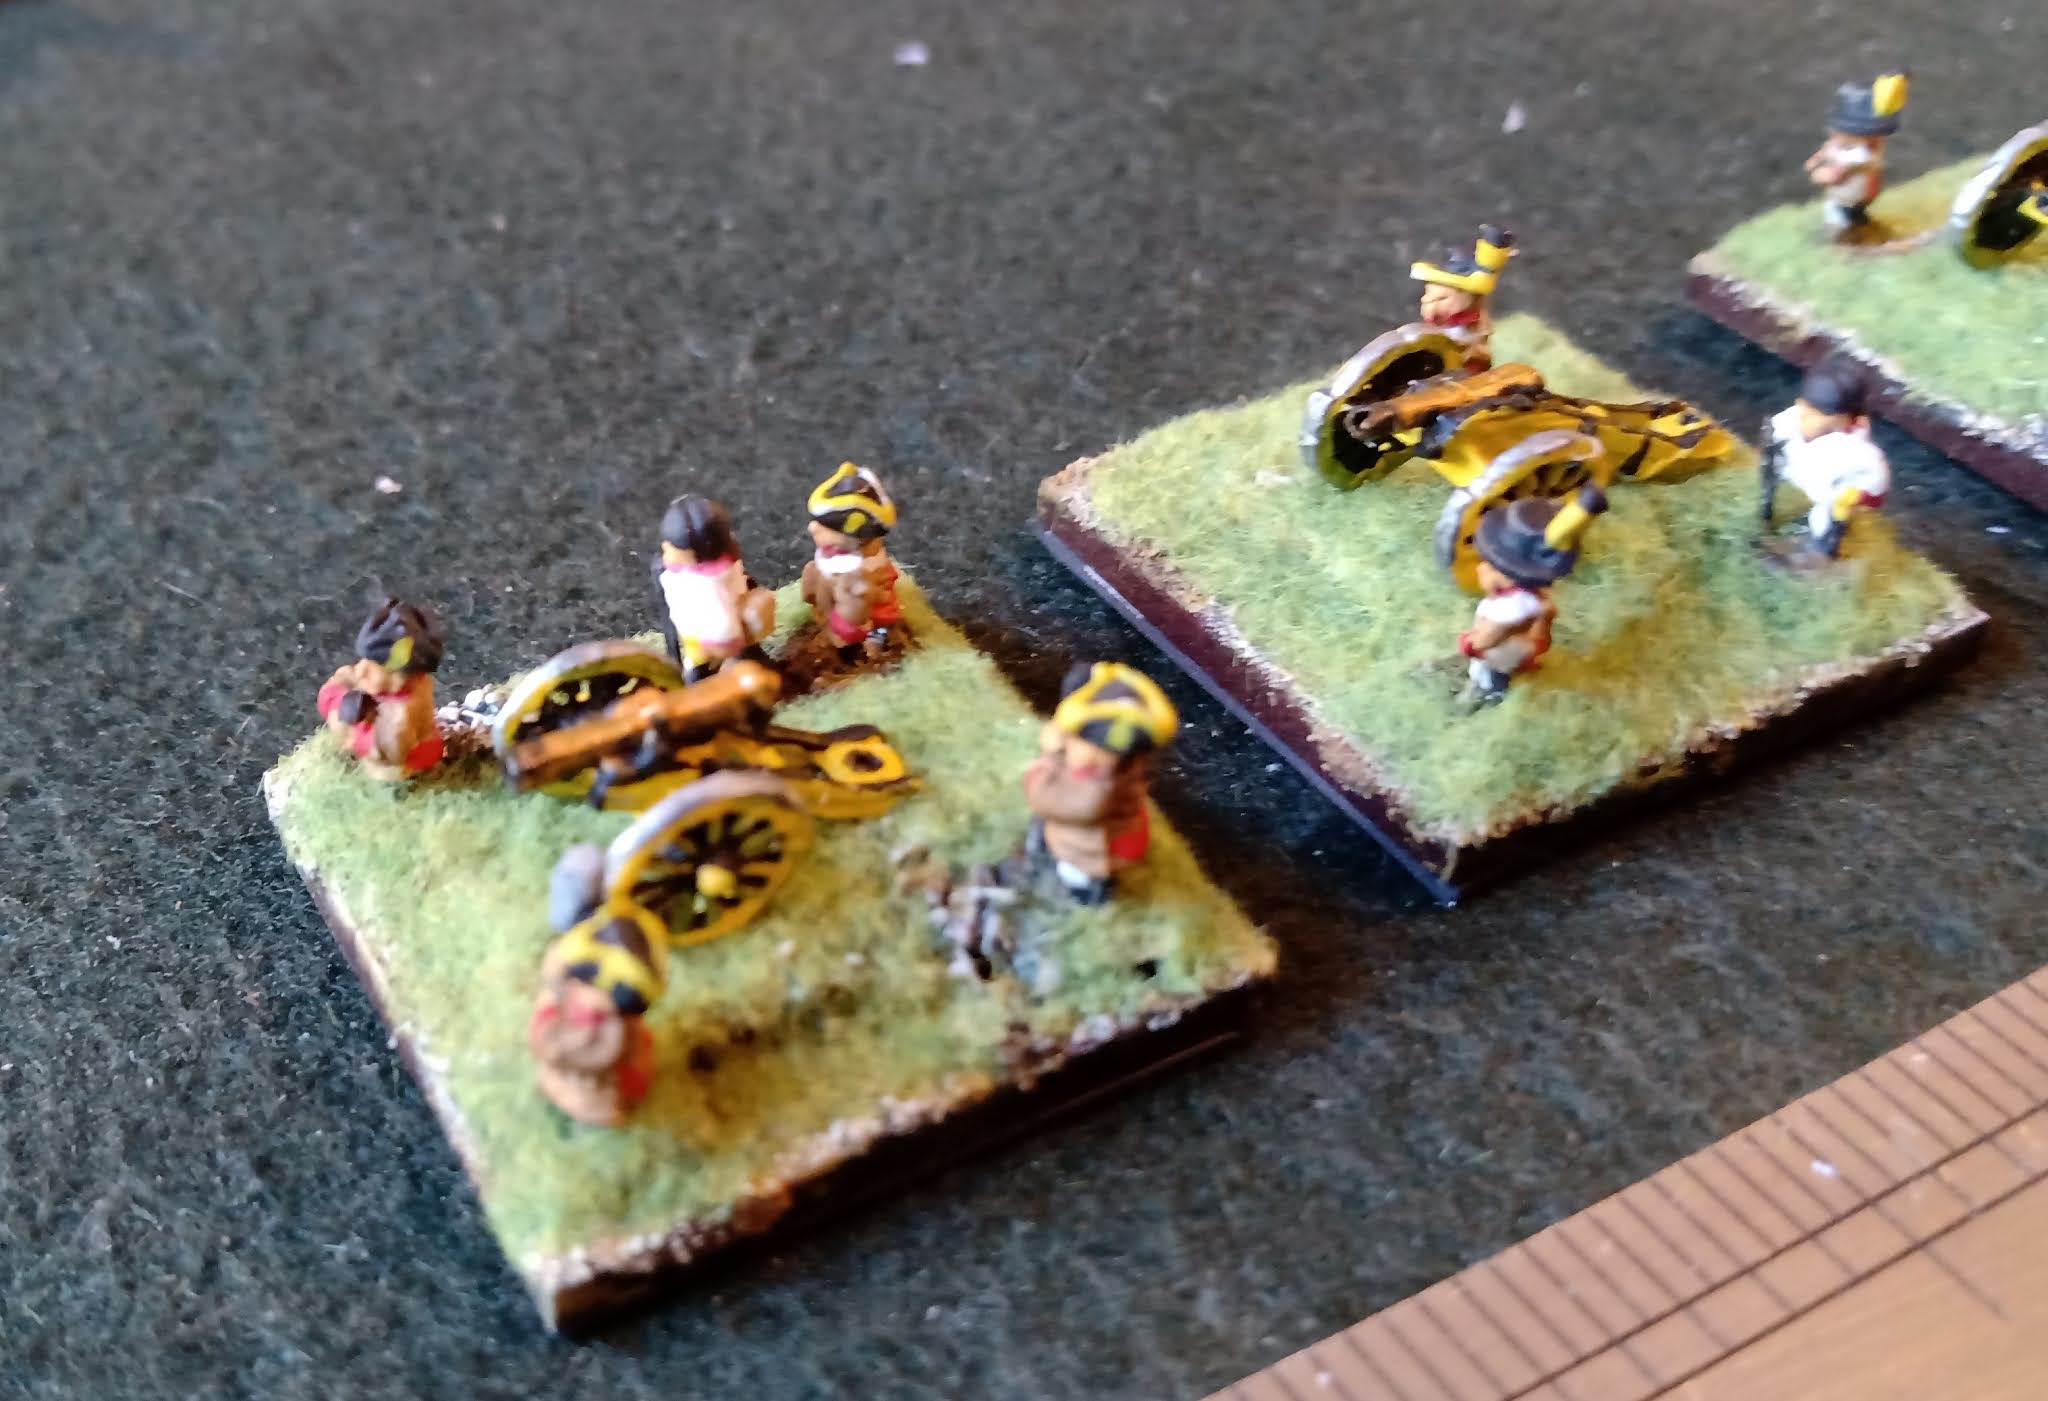
As part of my Austrian Army of 1792-8, I converted some artillerymen by scratch building Corsehats for them, worn with the upturned brim to the rear.
This is what they look like, now they have been varnished, based & flocked. Note that most Austrian gunners were rated as NCOs, so got attractive yellow hat lace. Also note that for this period extra labour was drafted in from whatever infantry units were nearby, hence various white coated figures dotted about.
As the artillery starts the period with gunners in tricornes, so some of my guns will have gunners in tricornes as well.
Enjoy!


As usual, I hope that this encourages you to have a go!
Here's some work-in-progress pictures of my three Austrian wagons, now they are painted & assembled.
Painting photos. I glued them on a stick so I could paint them without touching them...


Here are the wagons and the wheels ready for assembly...

Here are the wagons assembled, they now need some horses, a pole at the front to attach the horses to, horse handler and basing. Stay tuned...


Note that the spare wheel is angled down at 45 degrees. The stowage is plasti-card offcuts to make boxes, with strip as little handles. The ammo wagons were painted yellow, the mobile forge was either painted brown or was left natural wood (maybe clear varnished?).
Here's a couple of stowage pictures. A further option would be to drape a tarpaulin over the stowage (as you would not want your stuff getting wet!)...


The Austrian supply wagon - build instructions and suggestions.
Firstly, these instructions are intended as a guide and a record of how I built my wagons - please feel free to embellish, alter and improve to get the effect you want.
Secondly, the finish that i am aiming for is enough detail that the viewer can differentiate the wagons from each other, but these are not always going to be super realistic. They may be a foot or two longer or shorter than in real life, there may be more or less side struts than on the original, etc. If you want precision, go for 15, 28 or 54mm !
Step 0 - references. This picture of a HAT 1/72 wagon gave me the rough dimensions and outlines that I was aiming for.


7. Your wagon profile should look like this:

8. Turn the wagon over and file grooves where you want the axle to sit. The front groove needs to be shallower to compensate for the difference in wheel radius. Drill out the back of the wheels a little and superglue one wheel onto the brass rod, measure the axle length needed (measure twice!) and trim the axle so that the wheels are just proud of the wagon body - attach the second wheel. The top wagon (below) has had some stowage glued to the rear and then the luggage rack glued to the stowage and to the 1mm projections at the rear. Cut the ladder so you get two rungs.

9. The second wagon, well on the way. Cut a section from the 10mm plastic tube that is over 11mm x 6mm and trim to fit the top of the wagon, aligned flush with the rear. There will be a "shelf" at the front. Add pieces of 4mm rod on the wagon sides, using the ledge to secure them. I found this very fiddly, so I dipped one end of the rod in superglue (loctite superglue gel) and then, when I had attached all 5 struts, gave it a wash in mecpac liquid glue. At the top of the picture is a section of the large diameter plastic tube, used for the cover.

10. Final touches - there is a box on the front of the wagon - a piece of plastic rectangle cut to about 4 x 2 x 2 mm. I added a couple of 0.4 mm strip as handles.
Keep the wheels separate, so you can paint the body without them in the way.
So far - wheels "dry-fitted", stowage and front boxes added. Spare wheel will be added to one wagon. I added lateral strips to the roof - the original wagon appears to have strips with nails.


I trust that this gives you the inspiration to have a go. I certainly got a lot of pleasure from making a complete, reasonably accurate looking model from strip & rod !
One aspect of wargaming that is sometimes overlooked is the large "tail" needed for an army to operate.
Whilst one could incorporate logistics into the table top battles we play, the logistics tail is most likely to feature in battles either as an objective (steal the enemy supplies) or as a "road block", hindering a retreating army from getting it's "teeth" arms over river crossings or difficult terrain.
The number of wagons needed is quite considerable - here are some examples -
Bruce Quarrie's "Napoleon's Campaigns in Miniature" calculates that over 3,500 are needed to move the flour rations for 240,000 men for 25 days. Plus the wagons for beer, fodder, ammunition, etc.
WJ Rawkins, "The Austro-Hungarian Army 1792-1814 gives a figure of 11 wagons & 26 pack horses as the official allocation for an infantry regiment. Actual numbers would be considerably more, as Austrian Officers were definitely interested in "glamping" rather than "camping".
Without further introduction, here are the models:
Austrian Infantry Ammunition Wagon. This was modelled on the HAT 1/72 supply wagon - beautifully modelled thus:

Suitably inspired, I made a couple of 6mm versions - Wagon #1:


This needs a pole at the front. The wheels are from the Baccus Equ01* set. Stowage was scratch built.
Wagon #2. This will have a spare wheel attached to the rear stowage rack - this will be attached once I've painted the model.


Forge wagon. Every Austrian regiment had a forge wagon allocated. The Austrian design had the bellows in a compartment at the back, which means if I keep the tilt on, I do not need to model it!
My source material is this excellent large scale model in the Museum of the Battle of Wagram 1809 .
This volunteer run museum is well worth a trip. Not only are there loads of historical artefacts, when we visited in 2018 there was an excellent display of scratch built model Austrian military transport AND a huge number of Austrian 1/72 plastic soldiers, arranged in real regiments and battalions in 1:1 scale.
So here are some "eye candy" photos of the forge wagon (thanks to Sarah for excellent photos!):


Here is scratch build progress to date...


The forge still needs the front pole, rear baggage rack & spare wheel, etc.
*Baccus Equ01. I bought one of these for use as generic baggage wagons a couple of years ago. As I needed wagons with different outlines, Peter kindly took back the 4 carts in exchange for 4 x 4 horse teams and 4 sets of wheels. Lock-down has given me the space to have a bash at getting the wagons I want! (Thanks Peter!)
Finally, for those who are interested, here is where I got the details for my quotes on wagons & logistics...
Napoleon's campaigns in miniature - Bruce Quarrie:
regarding flour rations for the troops:
"...the Imperial Guard Corps in 1812. They were provided with ... 1,720 wagons for 'ready use", plus... 1,200 comtoises... ... and a further... ...600 more heavy wagons... which was designed to be adequate for 240,000 men for 25 days."
In addition to the flour wagons, there was wine/beer and fresh meat, which was normally vast herds of sheep & cows. There were also wagons needed to carry the fodder for the supply wagons.
CB2 - Austro-Hungarian Army - WJ Rawkins:
"in 1789 each infantry regiment had a support train of 14 Proviant wagons, 6 four horse ammunition wagons, a mobile blacksmith and 54 pack horses, PLUS each company had pack horses, mules & carts which carried the cooking utensils, tents, forage and sutler's stores. The infantry regiment had 534 tents..."
"In 1809 the regimental train was reduced to 10 four horse wagons, 26 pack horses & the field smithy." In 1807 the tents had been removed from the equipment and troops were expected to billet on the locals at the ratio of 10 men/cottage.
In 1809 the foot artillery had 1 caisson per gun/howitzer and 1 provision wagon per two artillery pieces. The "cavalry" artillery had fewer ammunition wagons, but had pack mules and forage wagons.