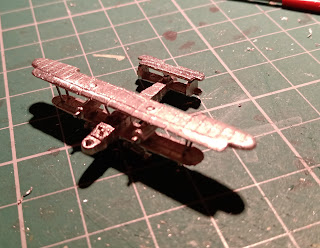
This week I went to the Leeds club (my new local) and played "Chocks Away!" - a WW1 very simple game that I came up with a few years ago for my tiny Tumbling Dice planes. Suitably inspired by an hour or so's fun, I have started to prepare my remaining HP O/400s for battle. Here goes....
The Tumbling dice kit. Usually, with Tumbling Dice, you get the plane as one casting, or two if it has non-retractable wheels. Here you get the body/lower wing, upper wing, 2 x engines, 2 x wheels (+ spare) and a tail. This is the casting, wire brushed, holes drilled and one central spar added.
I drilled out two holes at the outside of the wings - all the way through the lower wing and a good way into the upper wing, to receive a pair of struts each side.
I drilled 4 holes on the fuselage to accept a bent staple strut, which will provide a secure way of attaching the wing. One paperclip glued in, one to go....
I glued a strip of plastic on the outer side of the engine to represent the prominent tube radiators.
I glued the two engines to the lower wing, checking that they are parallel to the fuselage and at the same height above the wing.

Once I attached the top wing to the two engine mountings and the two staple based struts over the fuselage, I turned the plane upside down and threaded staples through to be wing struts. The plane should be sturdy enough that these additions are cosmetic only. Doing this from the bottom, into the part-holes previously drilled into the top wing underside means that the trimming and filling is only needed on the bottom of the plane.
I attached the two sets of wheels and re-inforced these with some off-cuts of plastic to secure the wheels to the plane. As it will "fly" on a stand, the undercarriage is cosmetic - but I still want it to be sturdy.
The next step was to add the top tail plane at the rear, like this -
The final step was to add guns. The HP O/400 had two x Lewis in front of the pilot (ring mount), 1 ventral gun (not modelled - I'm not sure where the hatch even was!) and two guns in the rear dorsal position. These seem to have been mounted to give cover to 180 degrees but this was done separately, at the corners of the rear dorsal station. I decided not to model the front guns as they are likely to get broken off - but I may rethink that and add some later.
Guns added:
Finished! The prominent gaps in the top wing around the engine mounts will be sorted out as part of the painting process.
In real life, the O type bombers were mainly used at night, but as this is just a knock-about simple game, I'm happy to have them operating in daylight.
As ever, I hope this inspires you to get some of these and have a go - they are quite quick to make and very satisfying once completed.


No comments:
Post a Comment